Introduction:
Email campaign is a powerful tool to engage with your subscribers and customers. Emails can be tailored to individual recipients, allowing for personalized messages that resonate with customers. Email campaigns help in building a solid relationship with your subscribers and customers.
In this article, You’ll learn ‘Guide to send email campaign in klaviyo’.
Let’s dive in!
Click here to learn everything you need to know about scheduling email campaign in klaviyo.
How to create email campaign klaviyo?
Follow the following steps:
- Click on ‘Campaign’ option in klaviyo
- Create campaign
- Give it a name
- Chose ‘Email’ from type
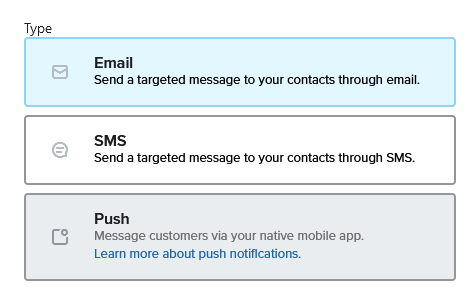
- Save and continue
- Select list or segment you want to send email campaign
- Specify list or segment in Don’t send to exclude them [ Optional ]
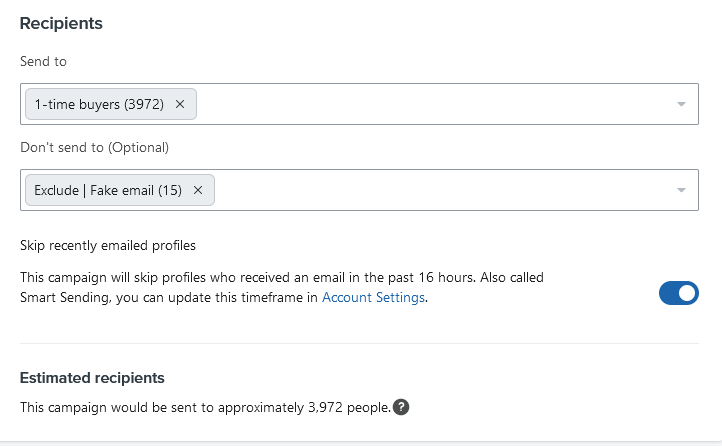
- Turn on smart sending if you don’t want to send multiple email in specific time like in last 16 hours or 24 hours etc.
- Toggle on tracking options to track your links properly in Google Analytics
![]()
Click here to learn everything about UTM tracking in klaviyo.
- Hit ‘Continue to content’ button in bottom right corner
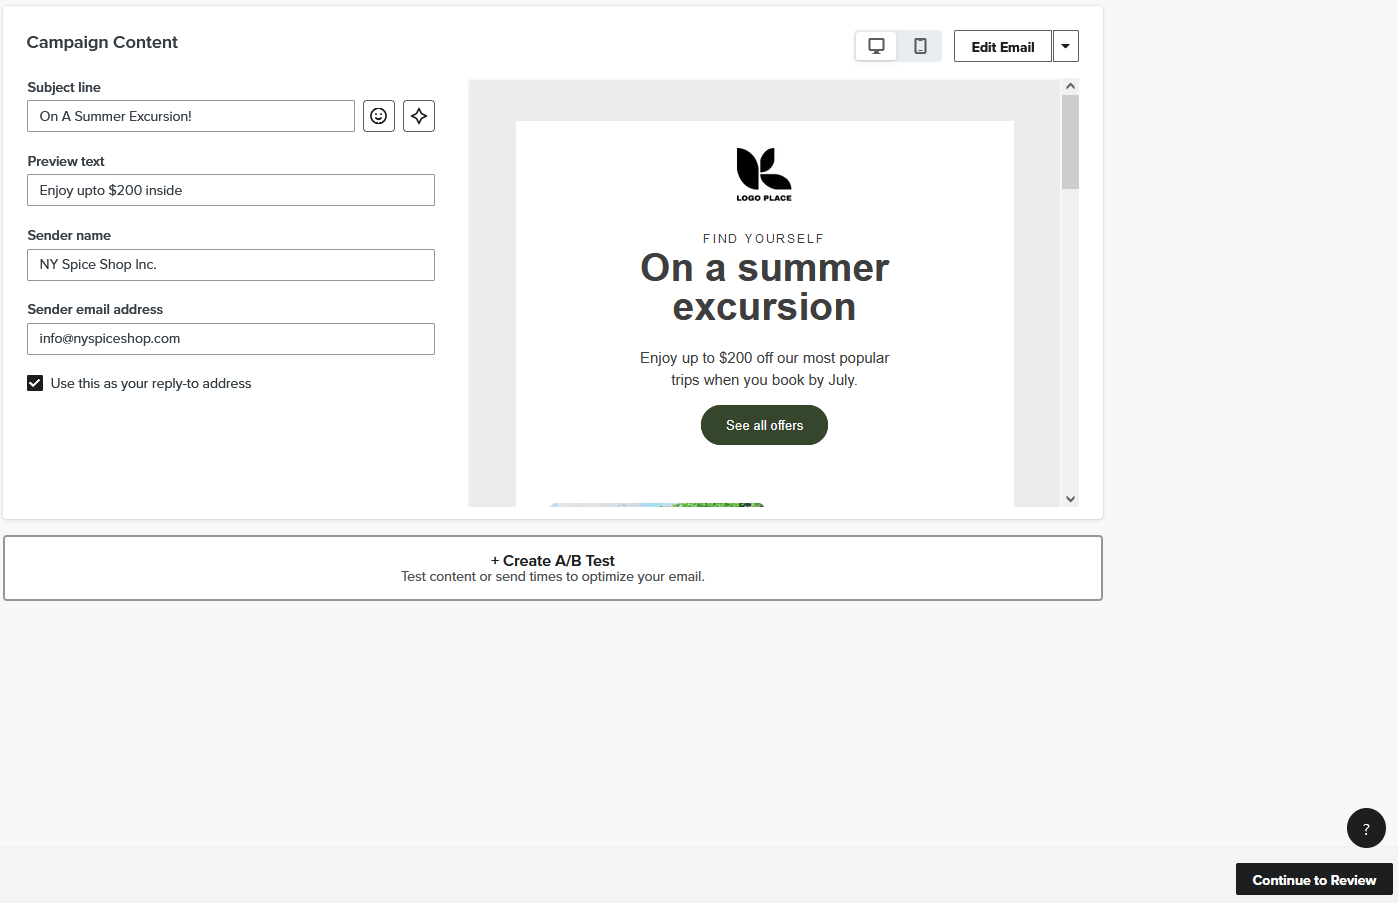
- Write your subject line and preview text and double check sender name and email before going on to the next step
- Select how you would like to create campaign content:
Drag and Drop:
Our email editor automatically optimizes your email for mobile and makes it easy to create complex email layouts.
Text only:
If you’d like to send a text-only email, this is the option you’re looking for. This is a good choice for sending an email that looks like it came directly from you rather than your organization.
HTML:
If you have your own HTML email template you’re importing, or you want to code an HTML template from scratch, this is the option to choose.
Use the drag-and-drop editor to make changes to your design and click Save Content.
How to send or schedule email campaign in klaviyo?
After finalizing your email campaign and ensuring that everything is good to go, then:
- Save your email campaign
- Continue to review
You will be redirected to the ‘Review Your Email Campaign’ page, where you can double-check:
- Subject line
- Preview text
- Smart sending option
- From and replies
- Unsubscribe link
- Tracking
After ensuring that everything is fine, click on the ‘Schedule’ or ‘Send’ button in the bottom corner.
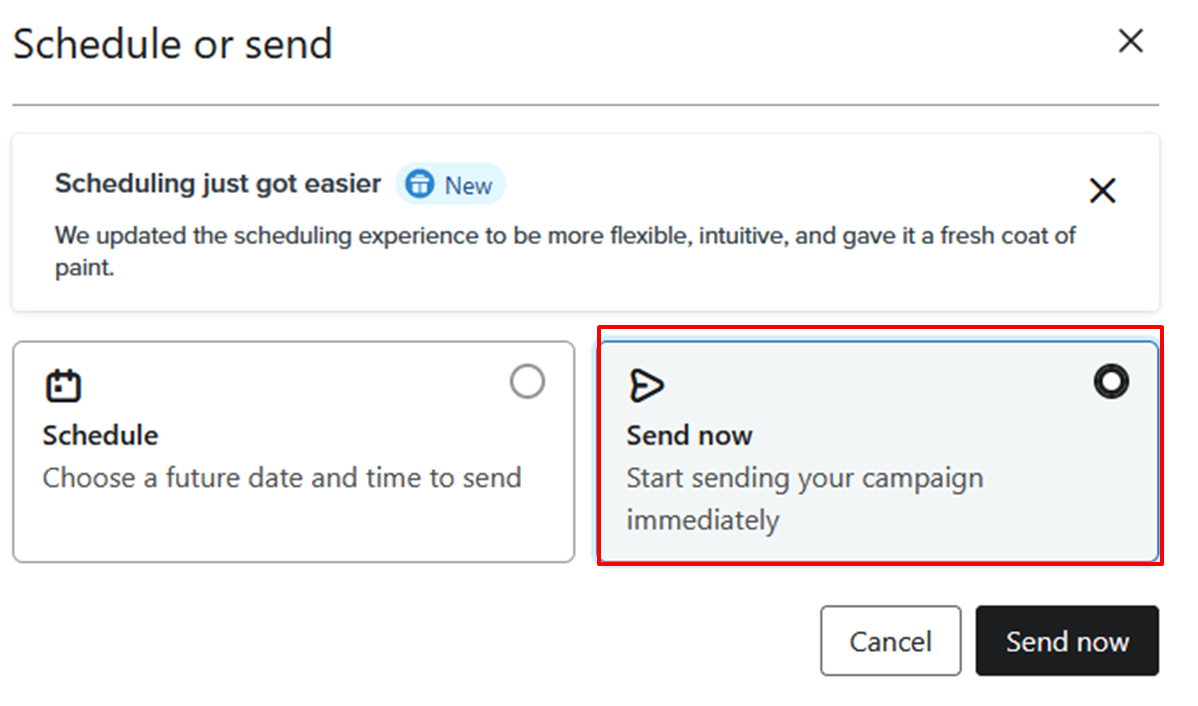
Then you will see 2 options
1] Schedule
2] Send Now
Send Now:
When you click the ‘Send Now’ button, all other scheduling options for your email campaign will be hidden.
Simply click ‘Send Now’ again to send your email campaign immediately.
Hope you loved this article ‘Guide to send email campaign in klaviyo’.
Wanna take your E-commerce business to next level with proven email marketing strategies? You’re just ONE step away. DM ‘Klaviyo consultation’ at info@alixemail.com OR WhatsApp us at : +1(929)5895851
Don’t forget to subscribe our YouTube channel [ Marketing Chamber ] for klaviyo tutorials. For Urdu/Hindi klaviyo tutorials click here. For English klaviyo tutorials click here.”
FAQs:
2] How do I create a new email campaign in Klaviyo?
Answer: In Klaviyo, go to “Campaigns” and click “Create Campaign.” Choose your campaign type (e.g., email), select your audience, and create your email content.
3] What’s the best time to send email campaigns in Klaviyo?
Answer: The best time varies by audience. Test different times and analyze open and click-through rates to determine the optimal time for your subscribers.
4] How can I segment my email list in Klaviyo?
Answer: Use Klaviyo’s segmentation tools to filter your subscribers based on criteria like location, purchase history, behavior, and more.
5] Can I automate email campaigns in Klaviyo?
Answer: Yes, Klaviyo offers robust automation features, allowing you to set up email flows triggered by specific actions or events.
- Navigate to the Campaigns tab in Klaviyo.
- Click Create Campaign.
- Choose Email and click Create Campaign.
- Choose a name, recipients, and tracking settings for your campaign, then click Continue to Content.
- Choose Text Only.
- Write your message in the text editor.
- Navigate to your Campaigns tab.
- View your campaigns and the summary details, or hover over a campaign’s name for a more detailed view.


